Configuring shipping settings in the Google Merchant Center can be confusing, especially in the new version.
On this page, we will guide you on how to set up your delivery and returns information in Google Merchant Center and share some common mistakes to avoid.
Why Are Accurate Google Merchant Center Shipping Settings Crucial?
If there’s incorrect or missing shipping information, it could lead to product disapproval in the Google Merchant Center. This, in turn, could prevent your products from appearing in Google Shopping ads and organic search results.
How to Navigate the Delivery Info Tab
Even if your platform (like Shopify) handles some shipping details, you still need to provide comprehensive information in Google Merchant Center. This tells Google where you ship to and ensures accurate delivery estimates for your customers.
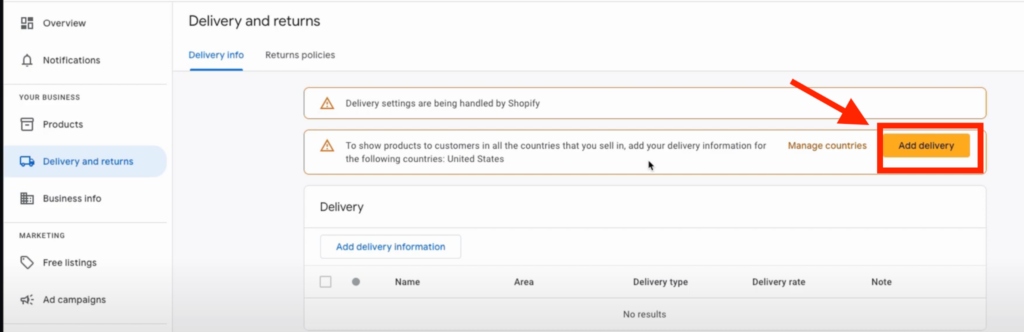
Step 1: Add Delivery Information
In your Google Merchant Center account, navigate to the “Deliveries and returns” section under the “Delivery info” tab.
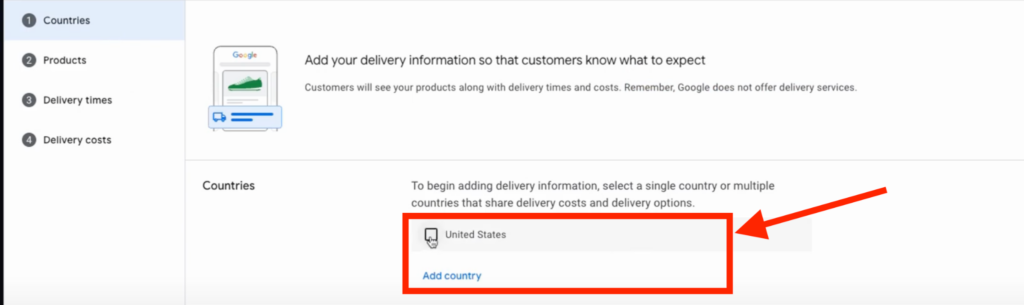
Click “Add delivery” and choose the countries you ship to
You can add multiple countries individually or use the search function. For this example, we’ll focus on the United States.
Once you’ve selected your target countries, click “Save”.
Step 2: Add Delivery Times and Costs
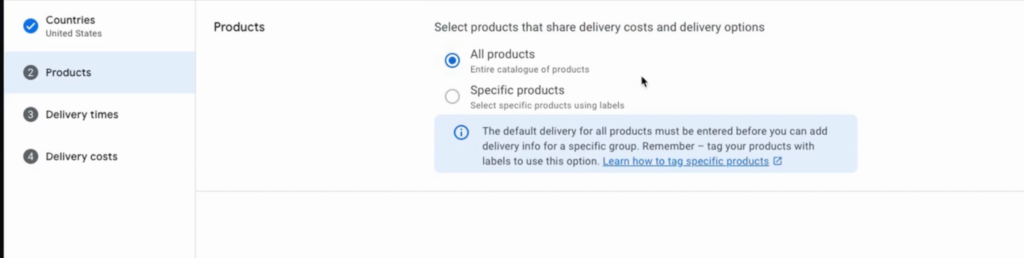
Choose the products you want to include in this delivery setup. You can select all products or specify items with unique shipping requirements.
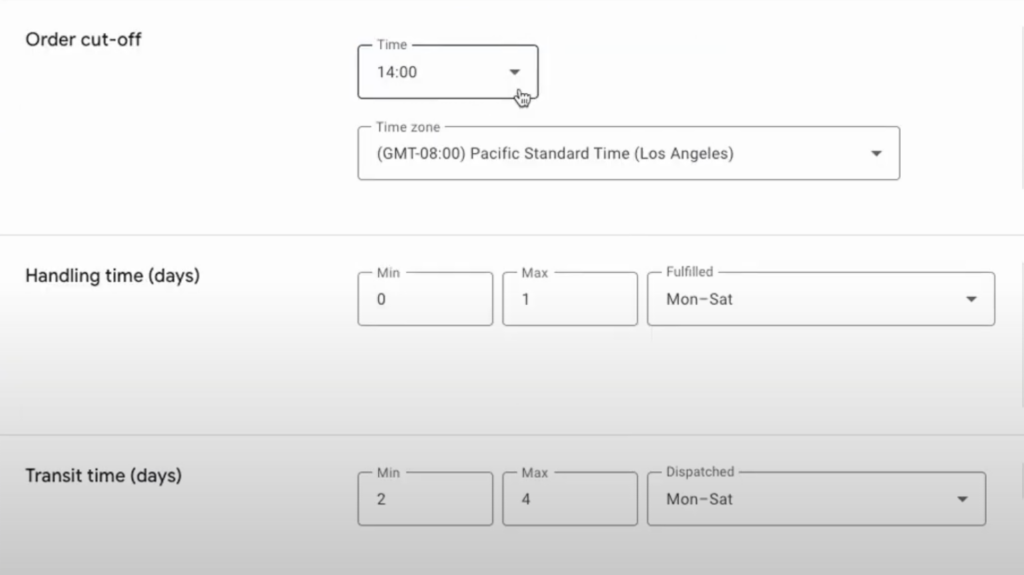
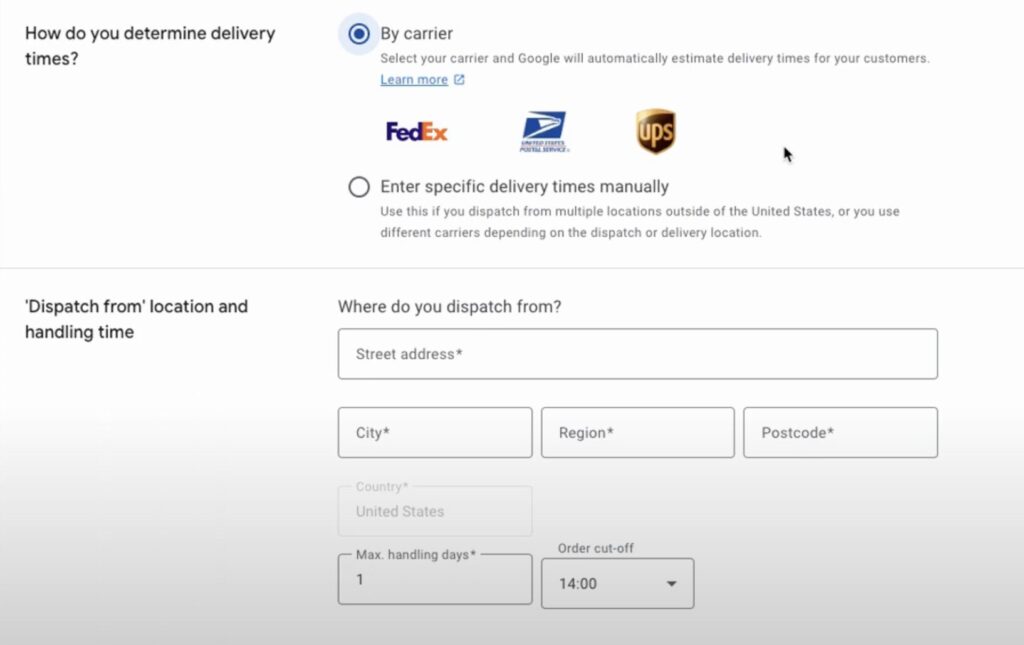
Moving forward, you have to add delivery times. This is where accuracy is key. Google needs precise information to estimate delivery times.
Configure the following:
Order cutoff time. The latest time an order can be placed to be processed on the same day.
Handling time. The time it takes to process and pack the order (excluding transit time). Be realistic; don’t include weekends if you don’t ship then.
Transit time. The time it takes for the shipment to reach the customer after it leaves your facility. If using carriers like FedEx, UPS, or USPS, Google can often automatically calculate this. If dropshipping, you’ll need to estimate based on your supplier’s information.
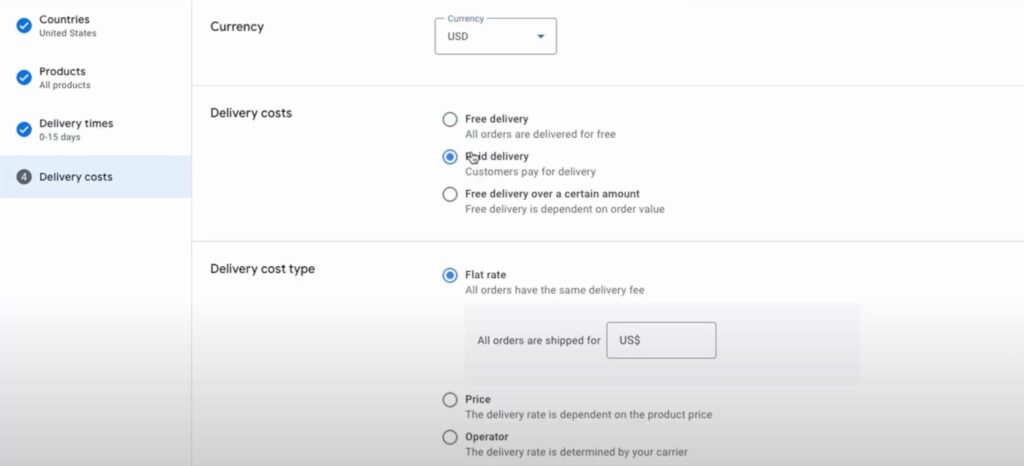
Once you’re done setting up the time, the next step is deciding delivery costs.
This is what you’ll see on your screen:
You have three options:
Free delivery
Paid delivery
Free delivery over a certain amount
If it’s paid delivery, you can further choose from the following options:
Flat rate
Varying rate by product price or operator or product weight
Choose the option that best suits you and add any further details (if applicable).
Step 3: Review and Confirm Delivery Settings
Before saving your work, double-check all your information. Ensure your stated delivery times align with your actual shipping practices and your store’s shipping policy.
Remember, this is your last chance to catch errors before saving.
Some common mistakes include unrealistic handling or transit times, mismatched currencies, and inconsistencies between your Google Merchant Center settings and your Shopify store’s shipping information.
Carefully review each field, paying particular attention to:
Are your delivery times realistic, considering potential delays?
Do your currency settings match your Shopify store?
Are your shipping costs accurately reflected?
Have you accounted for any potential seasonal variations in delivery times?
Addressing these potential issues now will save you time and frustration later.
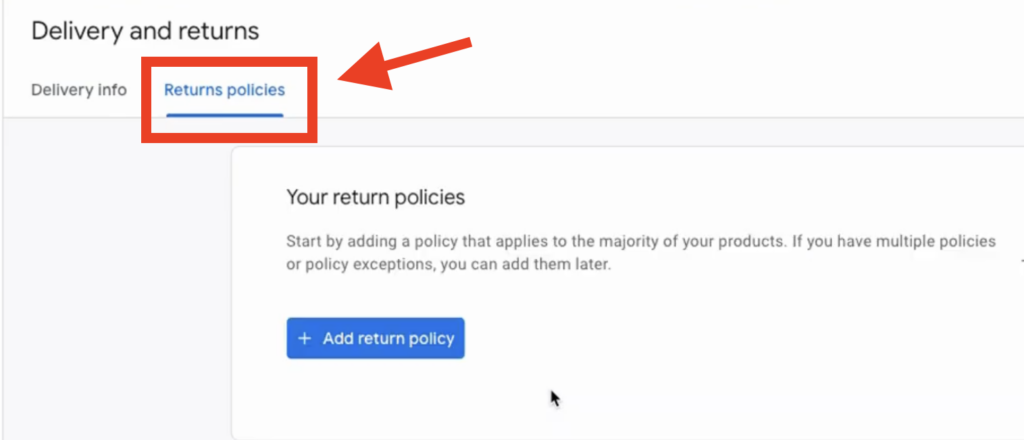
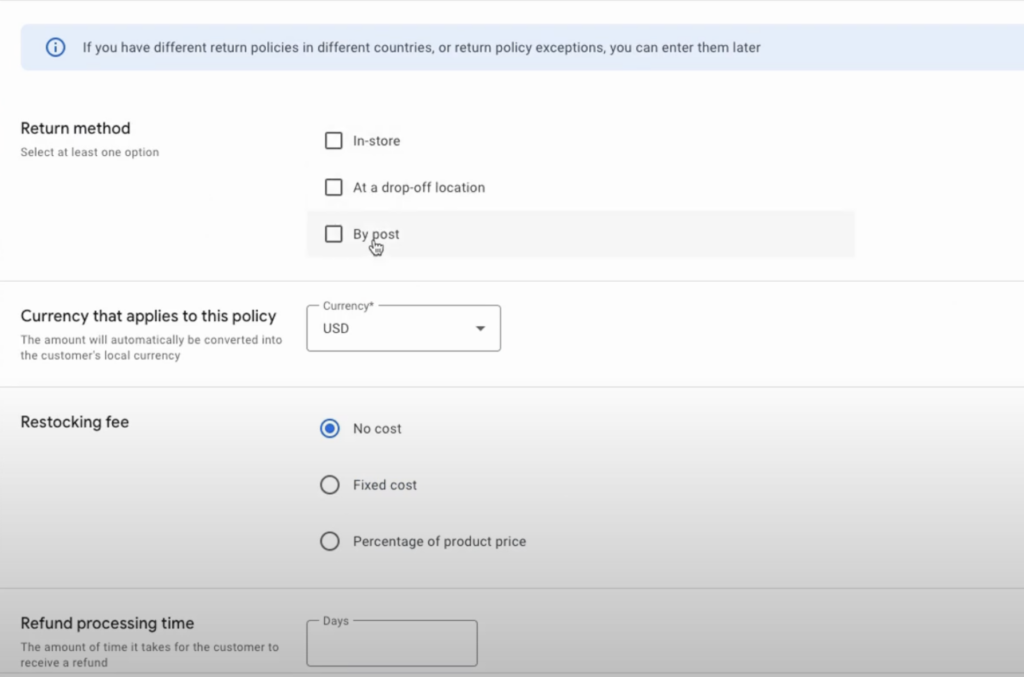
Step 4: Set up Return Policies
Within the “Deliveries and returns” section, you’ll see a returns policy section:
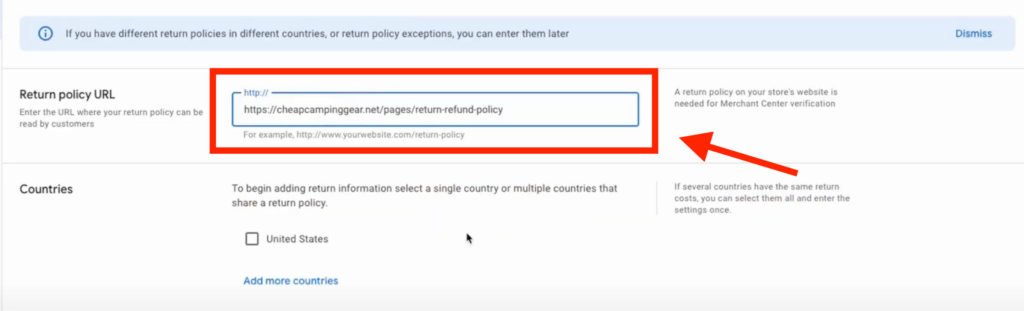
Click on the blue button that reads “Add return policy” and add the link to your Shopify store’s return policy page. This page should clearly outline your return process, conditions, and any associated costs.
On the same page, you will need to specify return conditions. Indicate whether you accept returns for defective and/or non-defective products.
Following this, there’ll be a series of questions about the same. You’ll need to specify:
The timeframe customers have to initiate a return
The return method
The party responsible for return shipping costs (customer or seller)
The time it takes to process refunds after receiving the returned item
Step 5: Make Final Checks
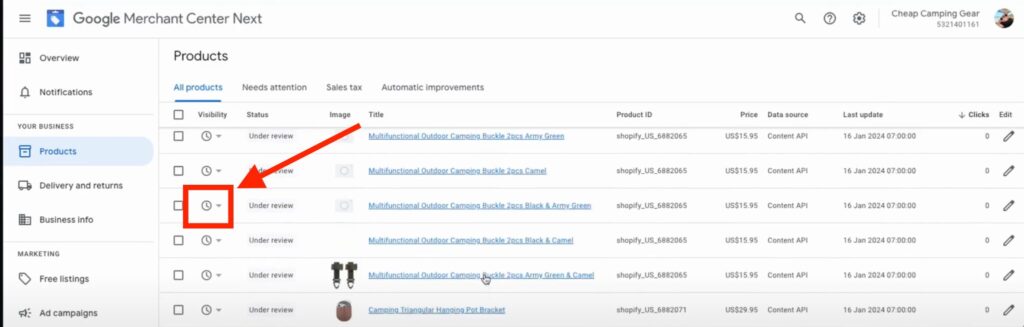
After saving your shipping and return settings, monitor your product status in Google Merchant Center. It may take some time for Google to re-evaluate your products. If issues persist, investigate further within your Shopify settings.
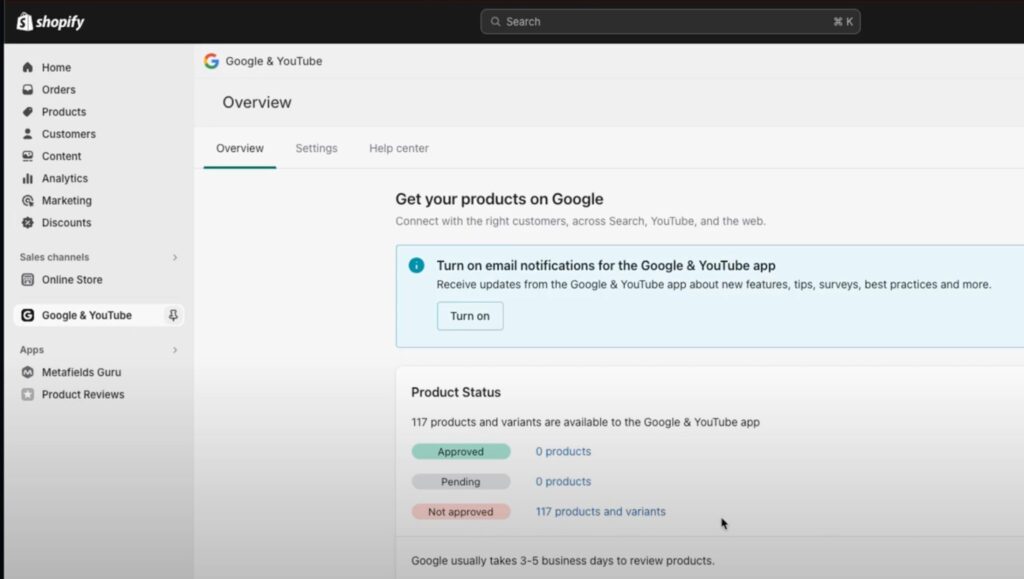
You can also check product status from the Google & YouTube app on the Shopify backend. Here’s what your screen will look like: