As a Shopify store owner, you’re likely looking for ways to optimize your Google Ads and YouTube campaigns to drive more sales and revenue. One way to do this is by setting up the Google & YouTube app for Shopify.
In this tutorial, we’ll walk you through the process of setting up the app and connecting it to your Google Ads and Google Analytics accounts.
Before You Begin
Before you start setting up the app, keep in mind that:
This app is best suited for smaller Shopify stores with fewer than 200 products and minimal product variations. If you have a larger store, you may want to consider using a more advanced solution.
Although the app is a great way to set up conversion tracking, it’s recommended that you also use the conversion tag and data layers to get accurate tracking data. If you’re not sure how to set these up, you may want to consult with a developer or tracking expert.
Step 1: Install the App
To install the app, follow these steps:
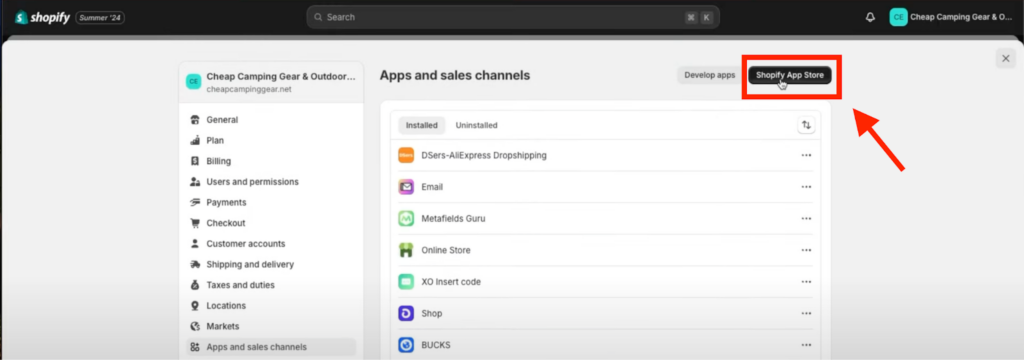
1. Log in to your Shopify store and navigate to the Settings page. Click on “Apps and Sales Channels”.
2. Click on the “Shopify App Store” button.
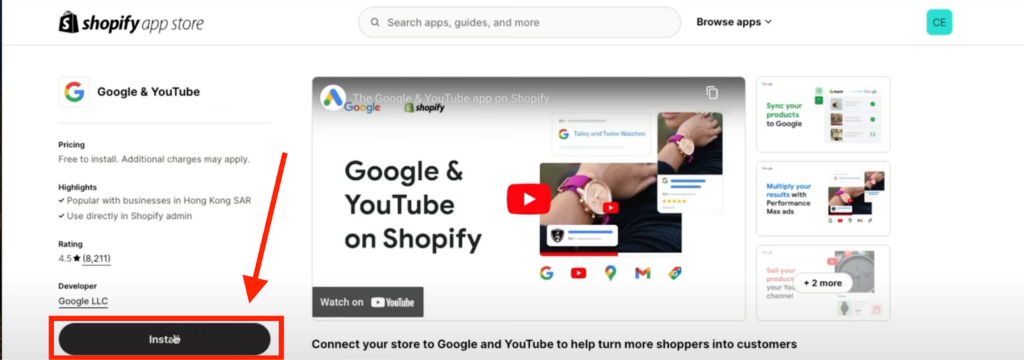
3. Search for the Google & YouTube app and click on the “Install” button.
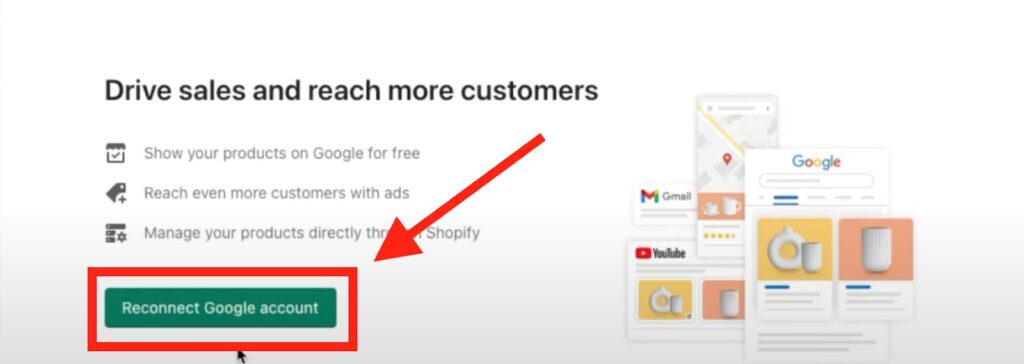
4. Follow the prompts to connect your Google account and authorize the app.
Find more details in the complete tutorial:
Step 2: Set Up Conversion Tracking
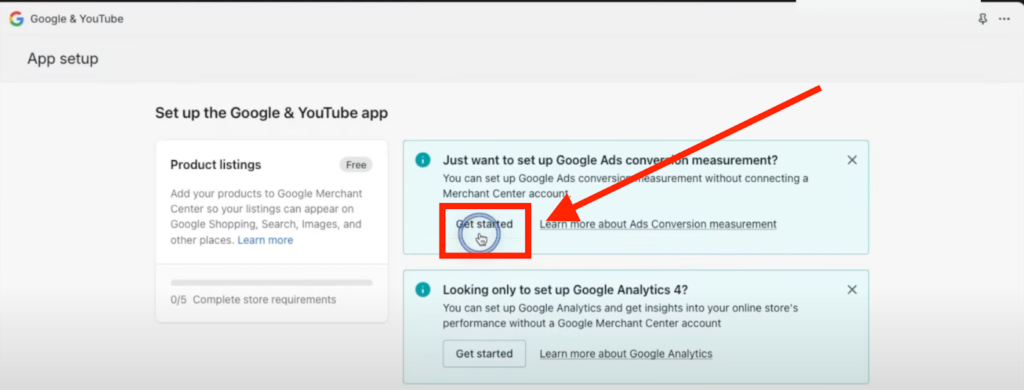
Once the app is installed, you’ll need to set up conversion tracking. To do this, follow these steps:
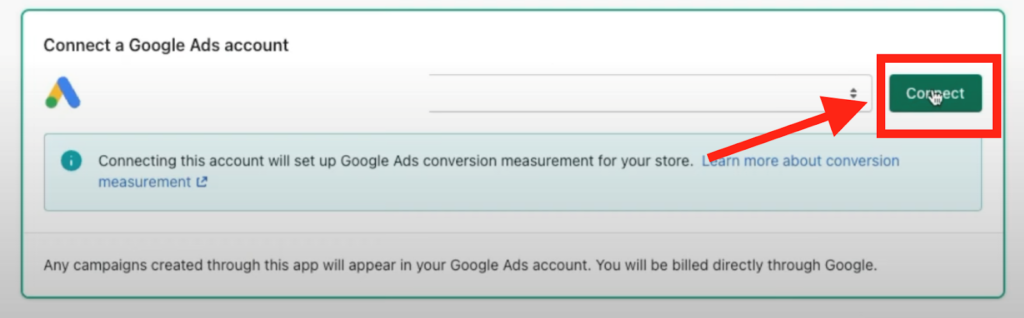
1. Click on the “Get Started” button and select the Google Ads account you want to connect.
2. Click on the “Connect” button and follow the prompts to authorize the connection.
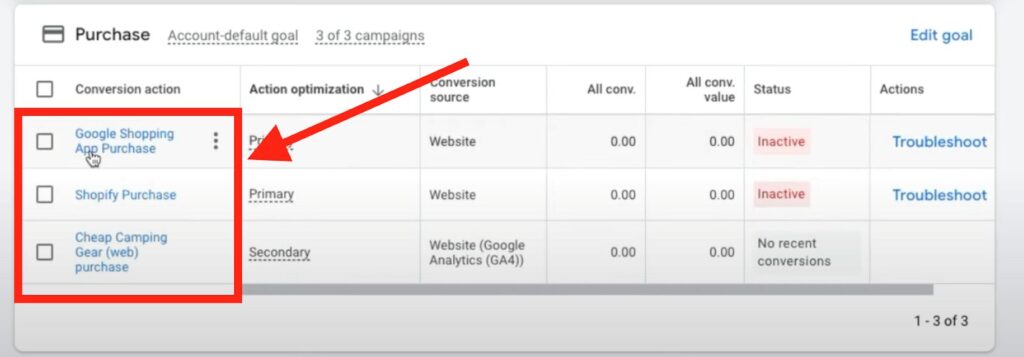
3. Once connected, you’ll see a list of conversion actions that have been automatically set up by the app. Review the conversion actions and make any necessary changes.
Step 3: Optimize Purchase Conversion Actions
When it comes to your purchase conversion action, it’s essential to have only one action being optimized. In this case, the Google Shopping app has automatically set up two primary actions.
To avoid any conflicts, we’ll keep the Google Shopping app purchase conversion event as a reference to compare conversion action results and ensure that the primary action is working correctly.
To do this, follow these steps:
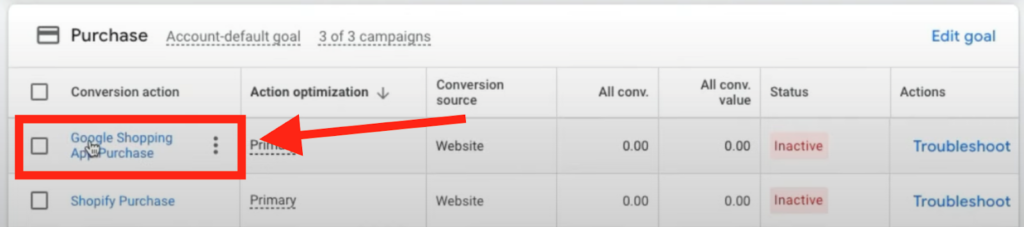
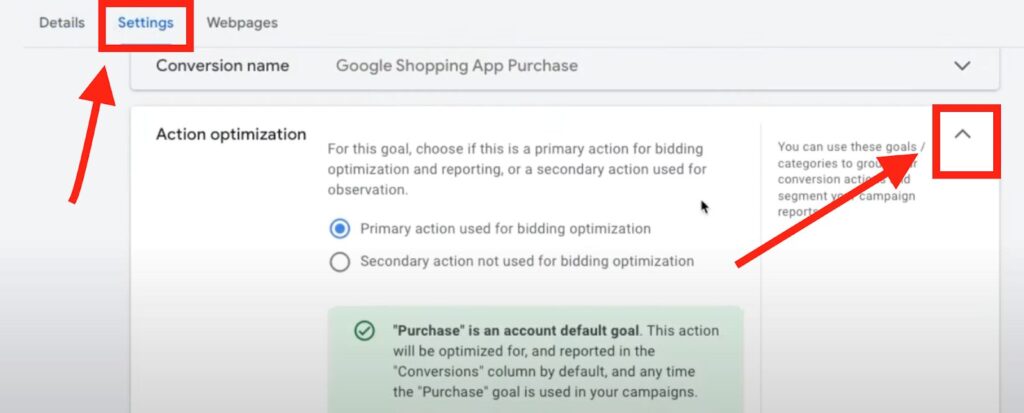
1. Click on the “Google Shopping App Purchase” conversion event.
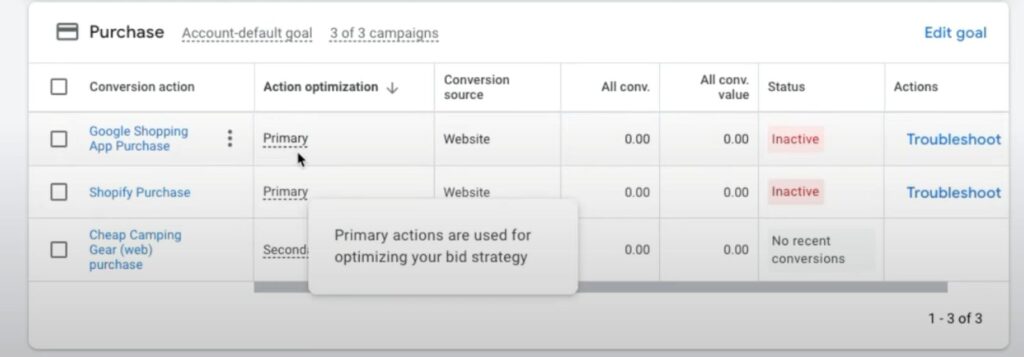
2. Go to the settings and click on the dropdown menu.
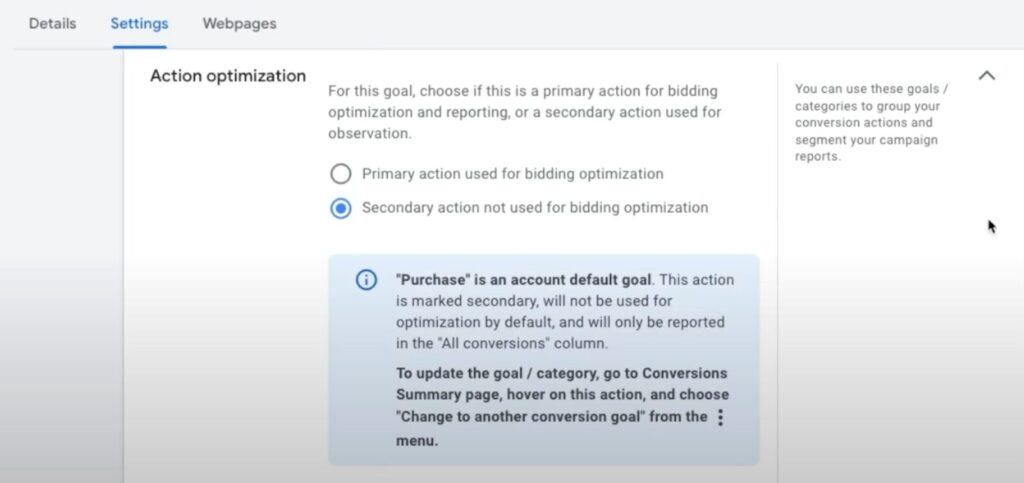
3. You’ll see that it’s set as a primary action with useful bidding optimization. Since we already have one purchase section set up as a primary action with full bidding optimization, we’ll set this one as a secondary action. So, select “Secondary action” and save the changes.
Email Notifications (Optional)
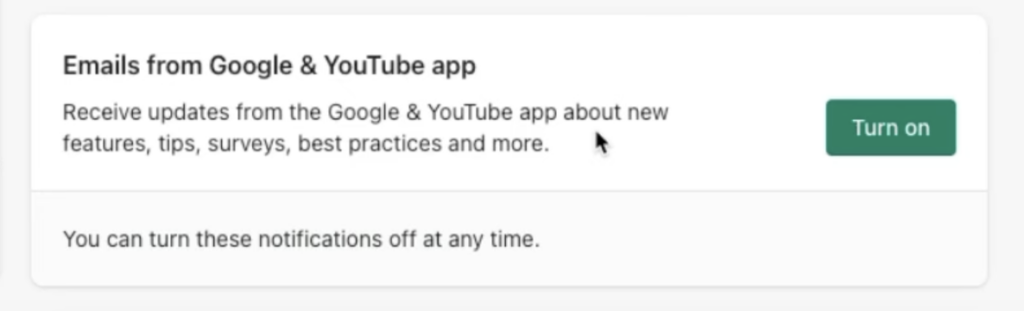
The app will also ask if you want to receive email notifications with updates, best practices, and tips. It’s up to you to decide whether you want to receive these emails or not. However, it’s essential to note that if the app makes any updates, it could affect your setup, so it’s a good idea to stay informed.
💡Tip: To make it easier to access the app, you can pin it to your navigation menu. This way, you won’t have to search for it every time you need to make changes or check on your setup.
Step 4: Connect Google Analytics
To connect your Google Analytics account, follow these steps:
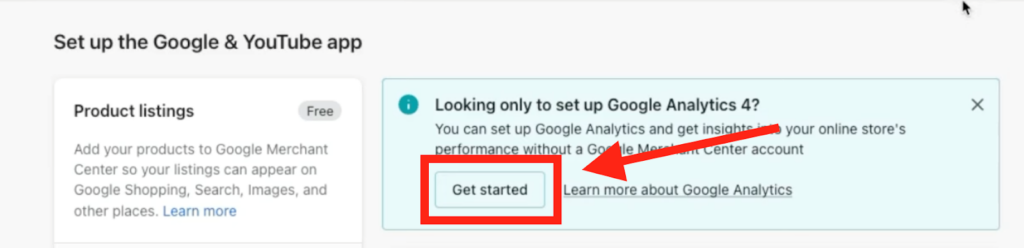
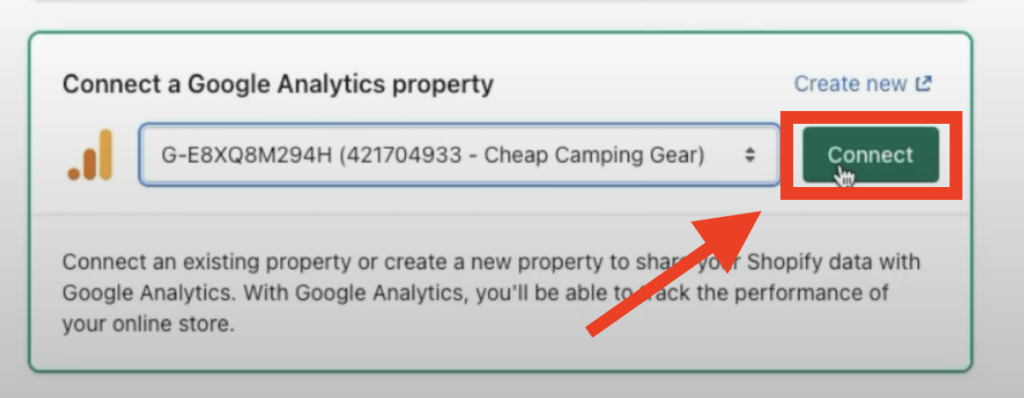
1. Click on the “Get Started” button and select the Google Analytics account you want to connect.
2. Click on the “Connect” button and follow the prompts to authorize the connection.
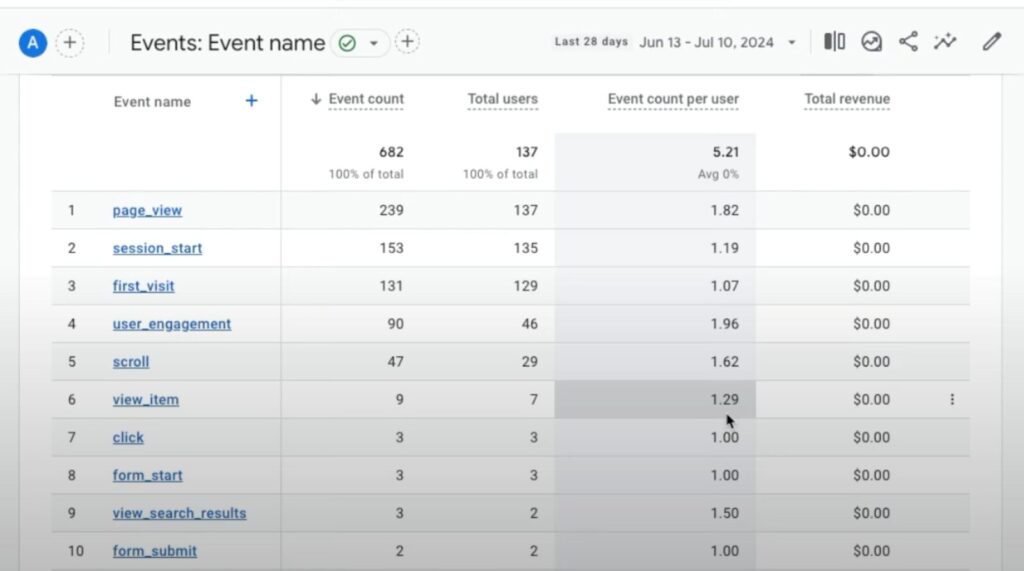
3. Once connected, you’ll see a list of events that have been automatically set up by the app.
Important Note: Avoid Duplicate Tracking
If you’ve already installed the Google Analytics 4 code or the Google G tag into your Shopify store, be careful not to double up your traffic or events.
While Google is getting smarter about detecting this, it’s still best practice to only have the tracking code installed once, either through the app or by adding it to your code manually.
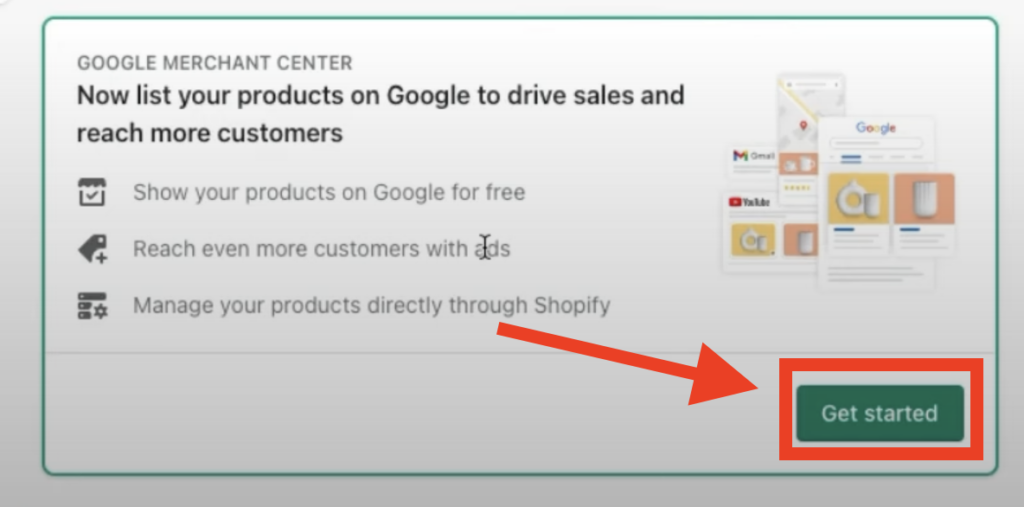
Step 5: Connect Your Google Merchant Center
To connect your Google Merchant Center account, follow these steps:
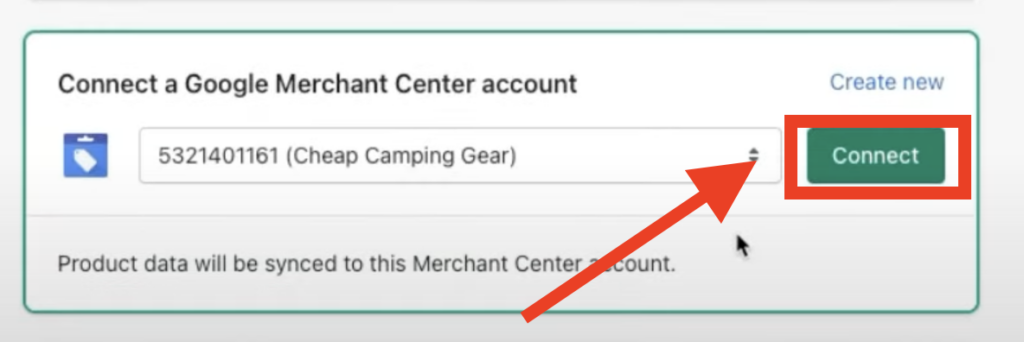
1. Click on the “Get Started” button and select the Google Merchant Center account you want to connect.
2. Click on the “Connect” button and follow the prompts to authorize the connection.
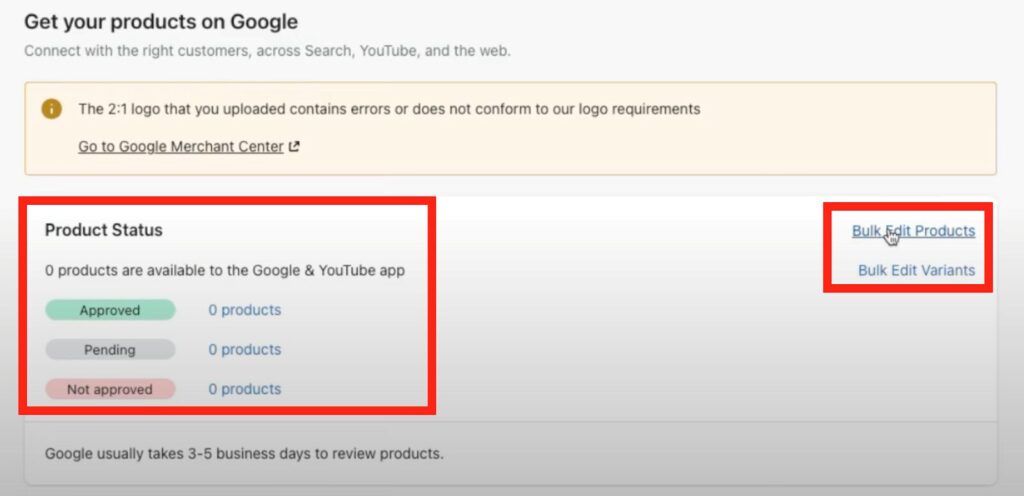
3. Once connected, you’ll see the following screen. You can explore the options.
Note: After connecting the Google & YouTube app, wait 3-5 business days for your products to sync and appear in the feed.